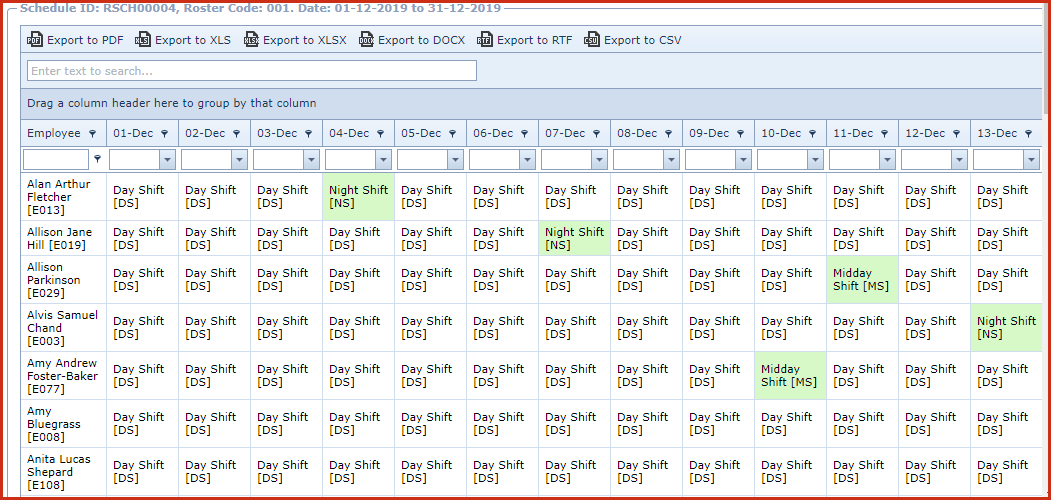
Roster Schedule is used
to plan and schedule the work shift of the employees. The "View" link on the
roster schedule provides a spreadsheet with a calendar view of the roster.
It lists the date and days to show on which day and shift a employee would
report to work.
Steps to create a Roster
Click on the "Green Plus Sign". This will open the
"Edit Form".
Enter below details
Roster Code - Select the roster code from the
list. Roster Codes are maintained under "Linkweb - Time
Maintenance
".
Territory - Select the territory code from the
list. Territory is maintained under "Linkweb - HRM Maintenance".
Branch - Select the territory code from the list.
Branch is maintained under "Linkweb
-
HRM Maintenance".
Cost Centre - Select the territory code from the
list. Cost Centre is maintained under "Linkweb - HRM Maintenance".
Pay Team - Select the pay team from the list. Pay
Team is maintained under "Linkweb - Payroll
Maintenance"
Employee - Select the employee if the schedule is
for a single employee. Leave this blank to create roster for all
employees
Default Shift - Select a shift the
roster.
Status - Select the status as one of the
below:
Active - Rooster schedule will be
editable.
Closed
Void - Entry will be marked as
"Void".
Notes - This is an open text field, users can
enter desired content.
Void - Void records will be "Disabled" and
will not appear in any
lookups.
Click on the "Grey Arrow" to expand into the
details.
The "Copy"button will copy the details of the roster can create a new
record. Figure 1: Roster Schedule
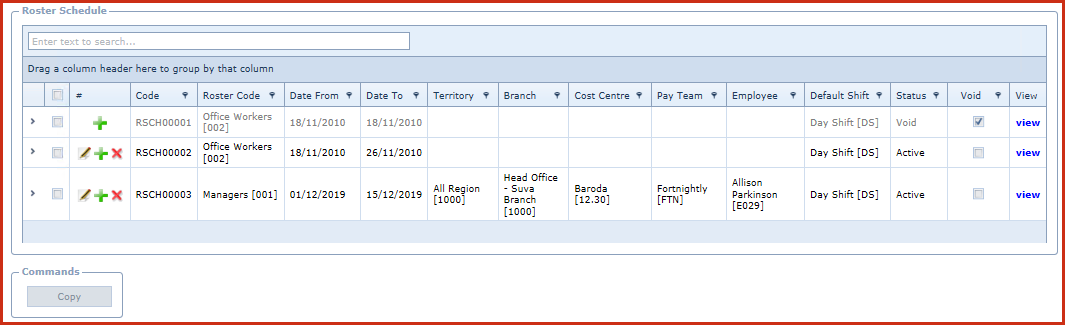 Figure 2: Roster
Details
Figure 2: Roster
Details